Installing a turbo kit on my '97 Astro
Ebay can get folks like me into lots of trouble. Back in June of 2002, a friend of mine pointed me to a set of headers on Ebay. They were Mesa brand headers for '96-up Astros and V6 1500 pickups. I asked the seller about them. They were headers he got at a surplus sale. Mesa is out of business, so this guy got the rest of their stock. I bought a few sets because I have a couple friends that could use 'em.
The guy also had a couple California Customs turbo kits for the '96-up Astro. Well, to make a long story even longer, I bought a turbo kit:
- brand new T3/T4 turbo modified for this kit
- small air-to-air intercooler
- Turbonetics external wastegate
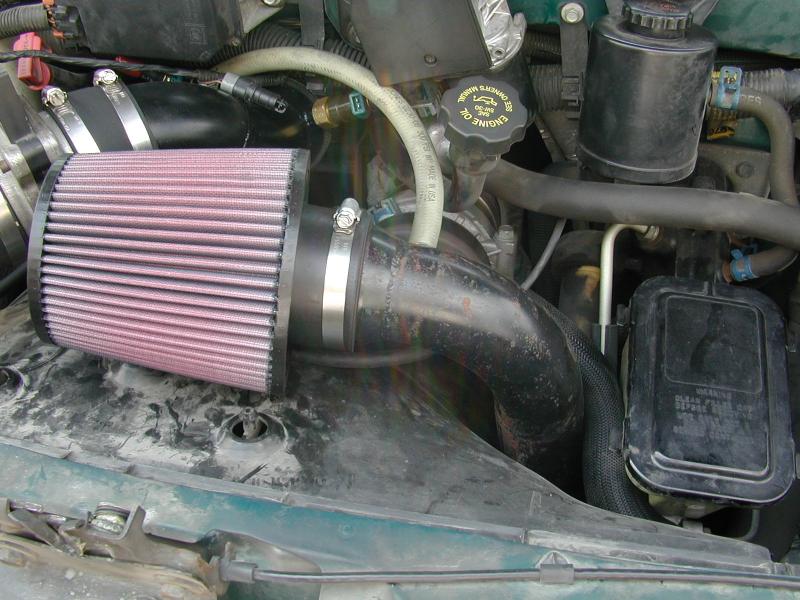
- K&N air filter
- new high-flow catalytic converter
- two extra injectors
- new thermostat
- lots of plumbing and other parts
- NO INSTRUCTIONS!
The guy told me that the turbo kit would bolt up to the headers, so I thought I was ready to run some serious horsepower in my Astro [grin].
I got my Mesa headers and put them on one Saturday morning. Piece of cake. When I was done, I pulled the exhaust plumbing from the turbo kit to see how it was going to work. I was shocked to discover that the turbo kit wasn't going to mount to those headers. The guy that sold me the parts suddenly became hard to reach. Such is life on ebay....
July 17, 2003
I finally got tired of friends and family bothering me about that turbo kit. Recent posts on The Astro Board spoke of the California Customs kit, so I decided to blow the dust off my kit and get it mounted.
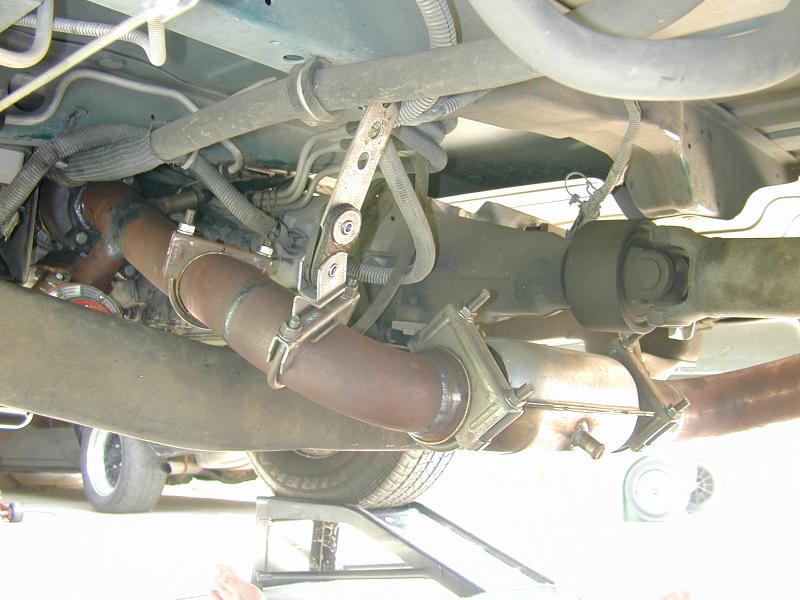
I spent today removing the headers and re-installing the original manifolds. Here is a picture of the Y pipe/crossover of the Mesa headers.
July 18, 2003
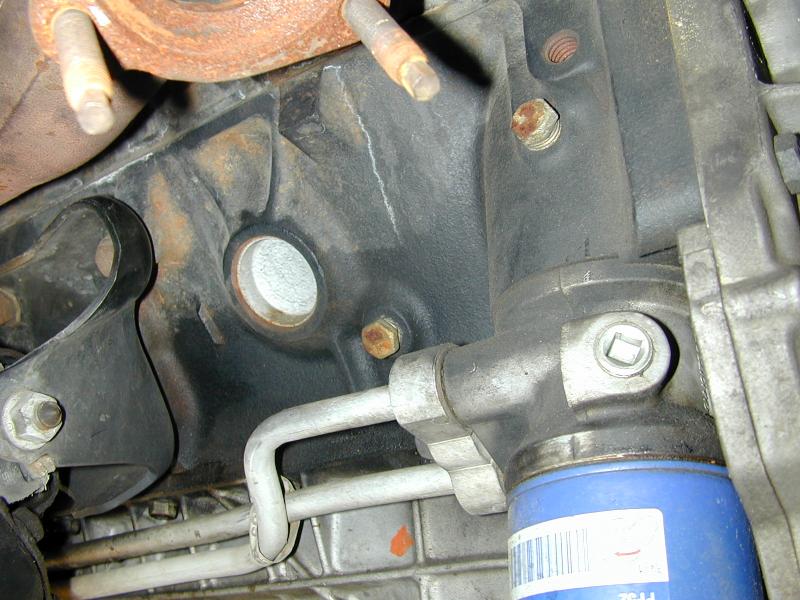
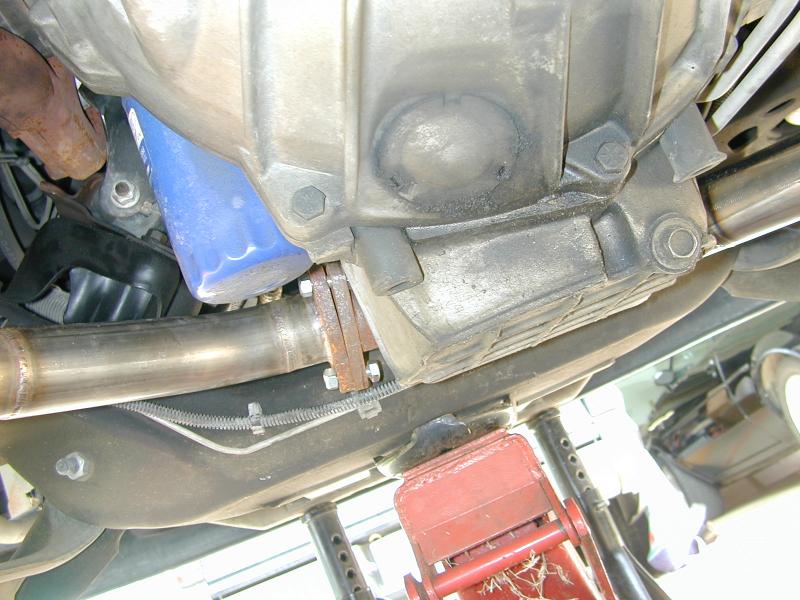
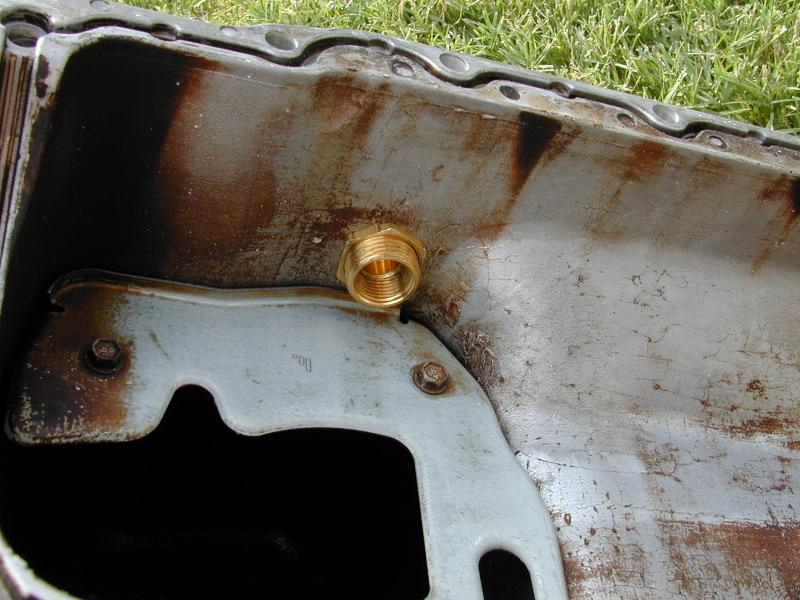
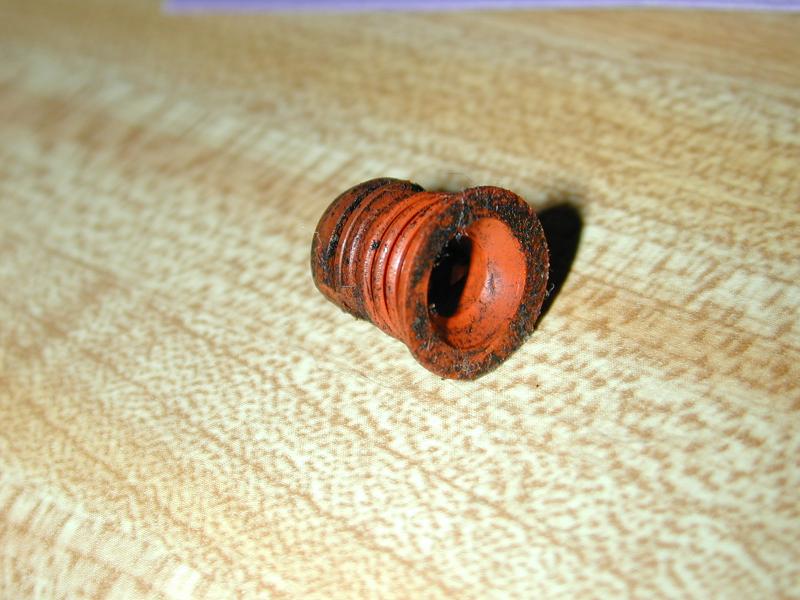
One of my big questions is where do I get oil and where do I return it? The following is a picture of the driver's side of the block. I think one of those pipe plugs is oil and one is water. I don't want to use the plug on the oil cooler adapter. If I recall right, the one above the oil filter is the same fitting that the Syclone uses for oil for the turbo. I guess and easy way to check is to remove the plug. The kit comes with a hose that looks like it'll reach from the turbo to that point on the block.
I was thinking about putting the return line about where that orange spot is on the oil pan. I'll have to remove that pan to figure out how deep the oil is in that pan.
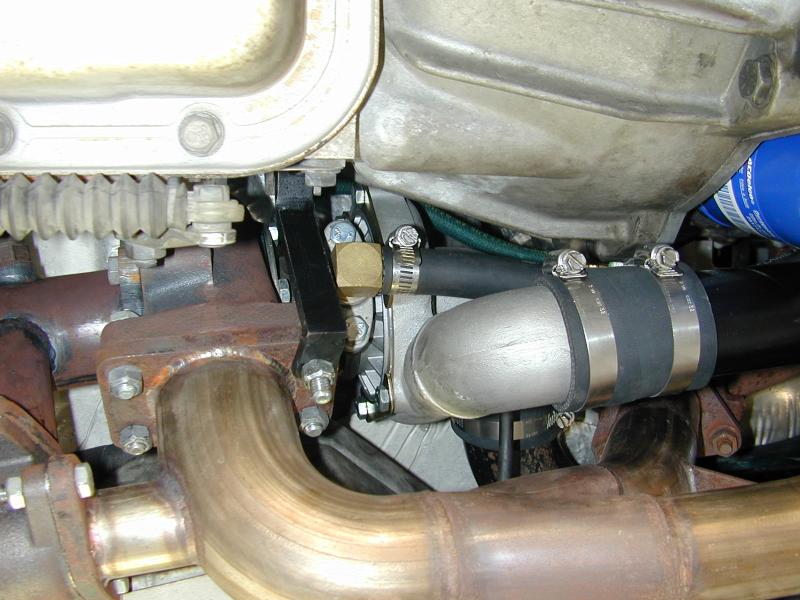
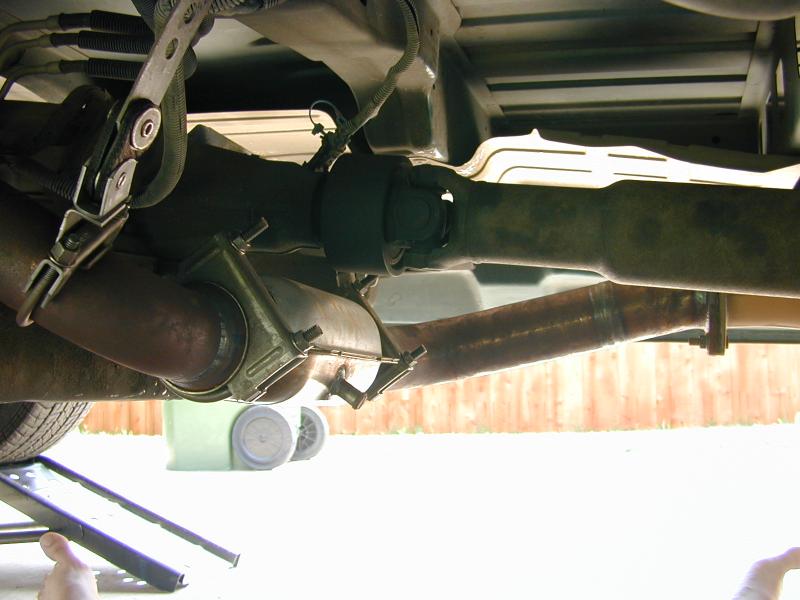
I bolted the crossover pipe together. This pipe will actually wrap around the front of the low part of the oil pan... cool.

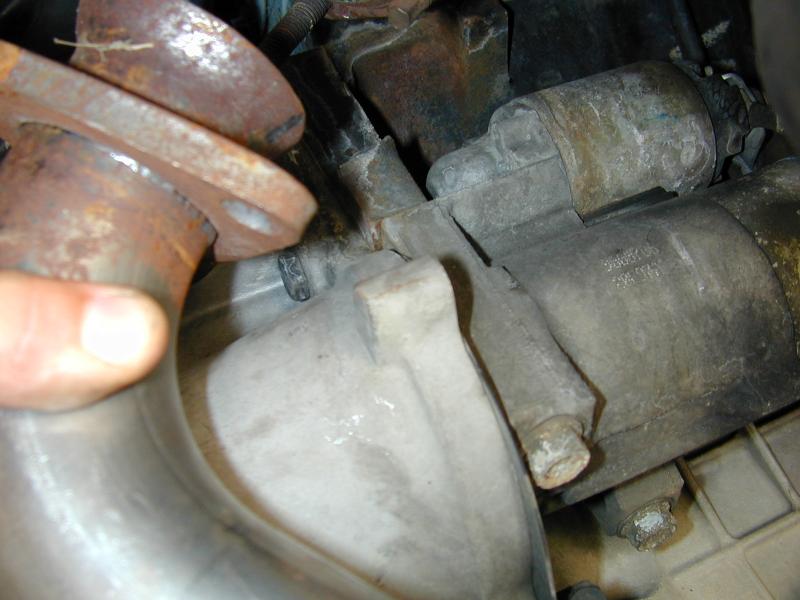
I encountered my first problem. The passenger side of the crossover pipe is hitting an ear on the tranny. I can almost get the pipe to bolt up, but it won't quite fit. I think I'll saw it off.
July 21, 2003
I didn't get to work on the van at all this weekend. My wife's little brother needed a car, so Tracey volunteered me to look for a cheap car for him. I found a 1990 Probe in decent shape on Saturday afternoon. I was assigned the task of making minor repairs and getting it ready for a delivery trip on Sunday. You guessed it... I was the delivery boy. A buddy and I ended up driving the Probe and another car to a midway point where we my Tracey's parents to give them the car. We got a free meal out of it, but I lost two days of prime project time... oh well. I've been married for nearly twenty years; I learned early that you sometimes have to do other stuff so you can get permission to work on the things you like.
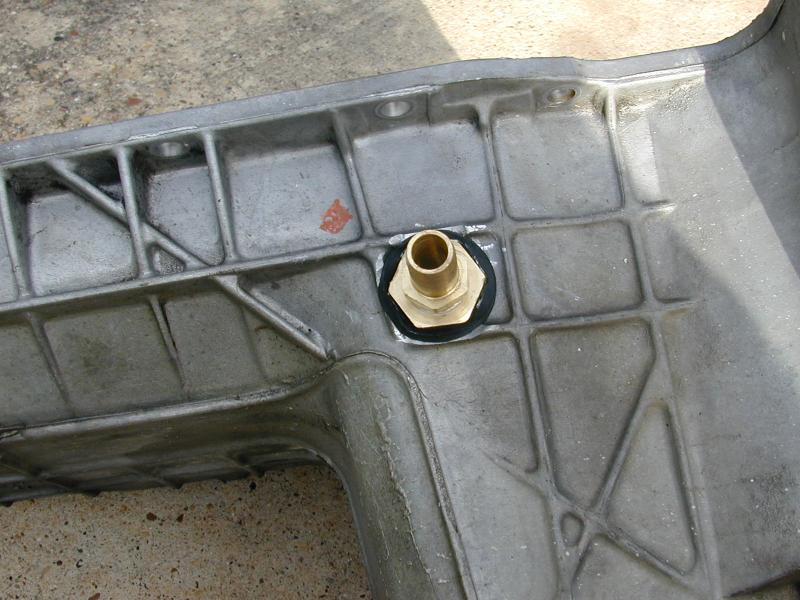
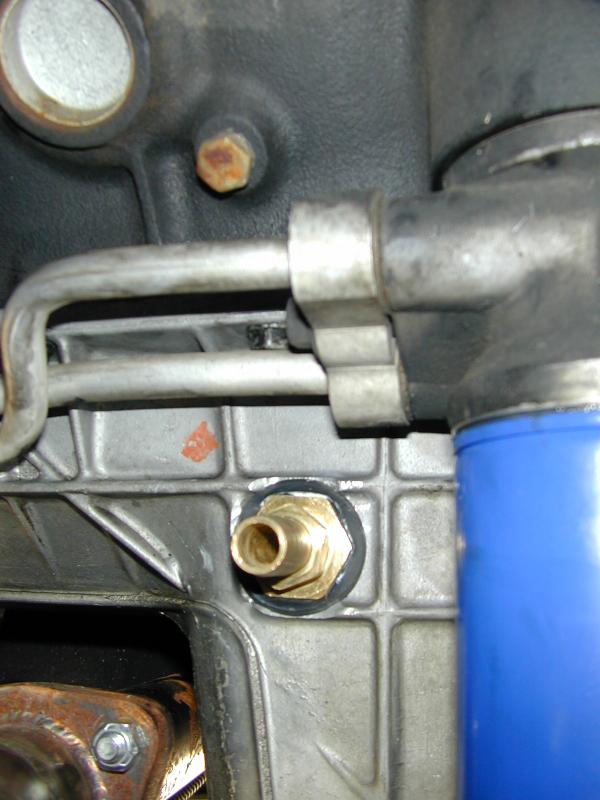
I installed a drain fitting in the oil pan to serve as a turbo oil return line.
July 22, 2003
I had to run to the dealer to get a gasket for the oil filter/cooler so I could mount that thing.... under $5.
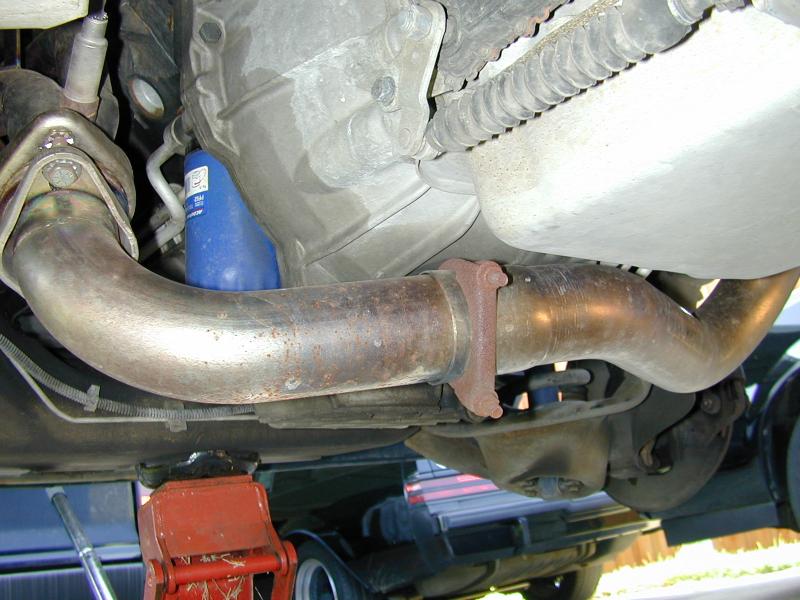
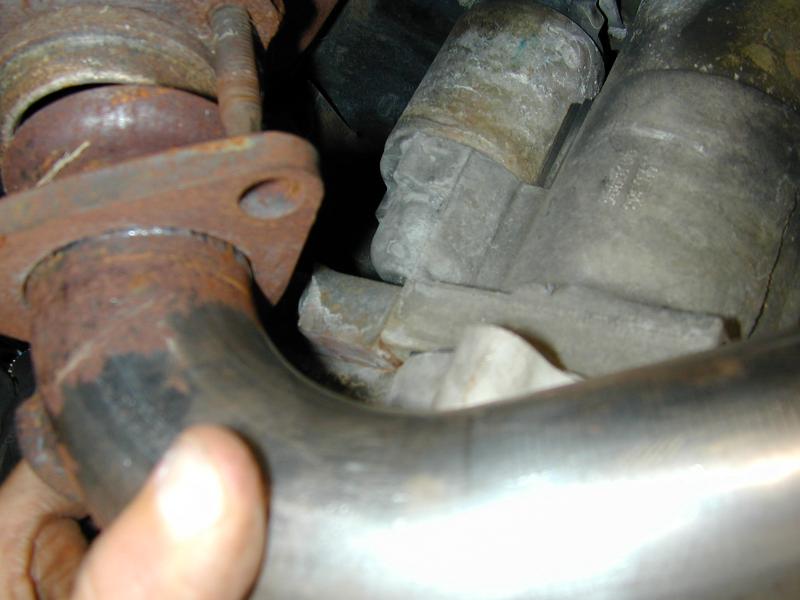
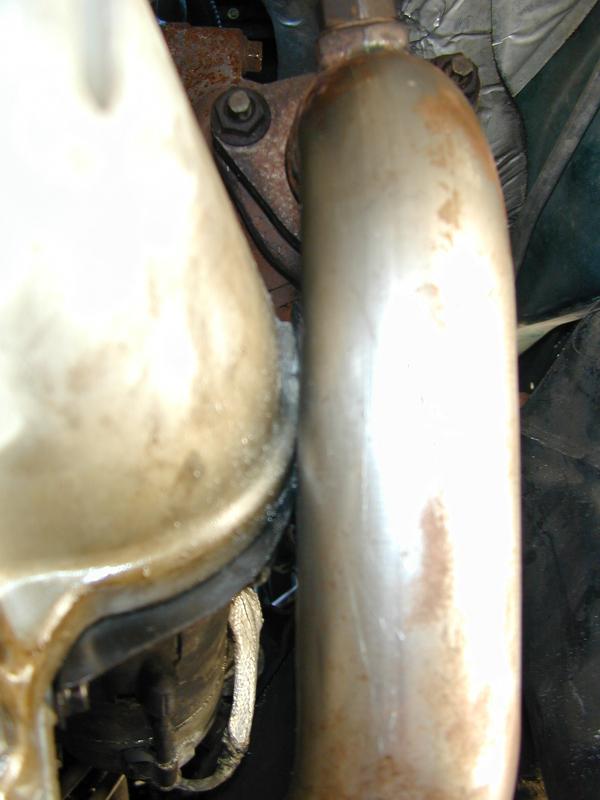
I removed that ear on the tranny and installed the crossover pipe.
Next to go in is the turbo. The fittings for the oil supply and return were all in the box. The hoses fit great.
I mounted the turbo and tightened all the bolts. When I tried to mount the downpipe and wastegate, they didn't line up. I had to loosen all the mounting bolts and install all the parts before I tightened anything.
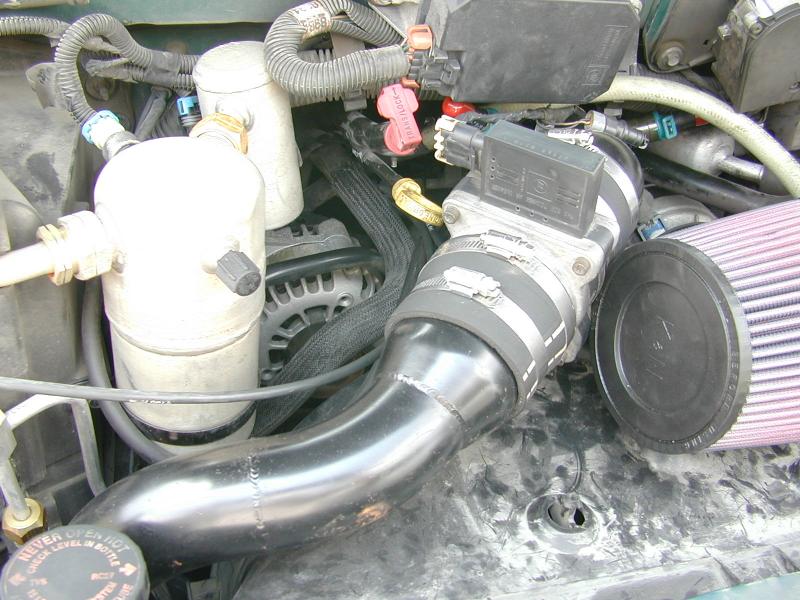
It looks like I need to extend a couple O2 sensors. The kit contains a short section of wire, but that doesn't look like enough... we'll see
Next, it was time to attempt to figure out where all those pipes go. I have no idea where the intercooler goes or how the intake tube and MAF will connect. After quite a bit of work, I figured out that the original airbox and hoses have to come out. I think the intercooler goes under the fan shroud and mounts to those two bars under the engine. I don't think a lot of air will flow over that. I may have to put a fan on it.
July 28, 2003
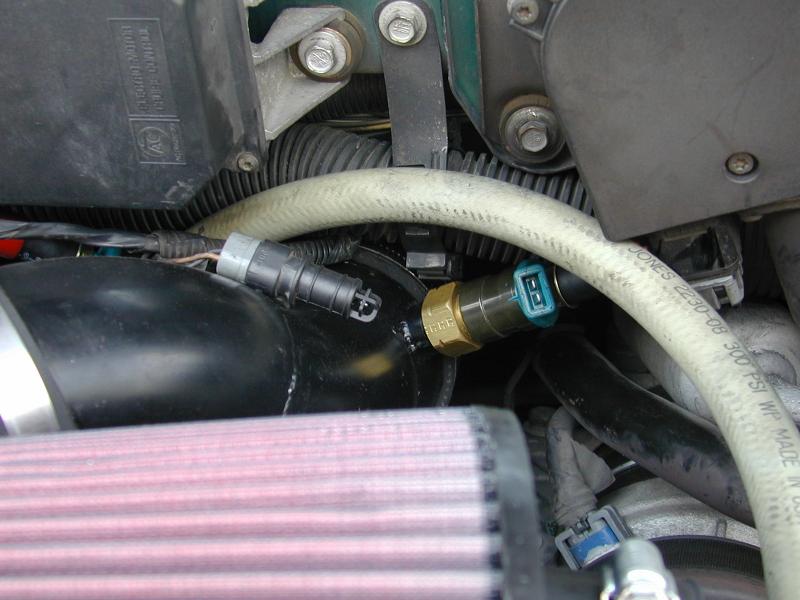
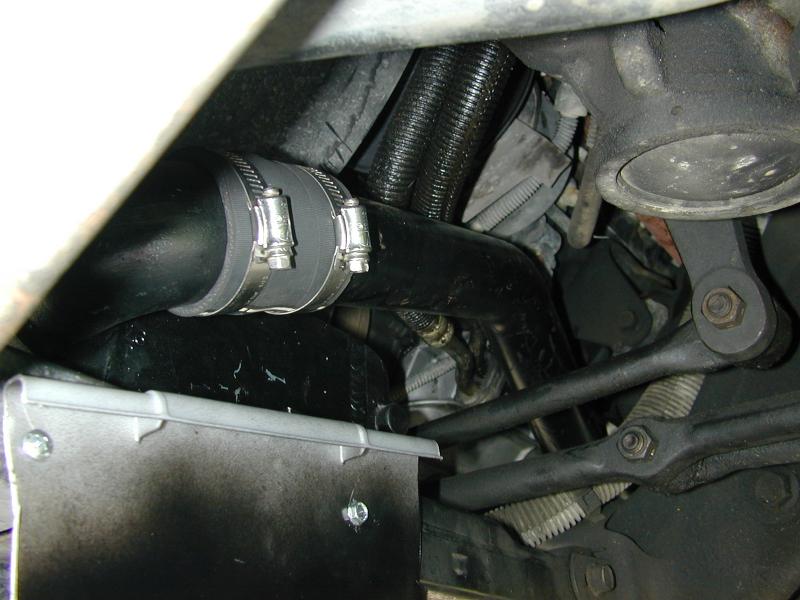
I hooked up all the intercooler piping and intake plumbing. It took me several trial fits to determine if the MAF sensor went on the end of the intake tube or in the line from the intercooler to the TB. I ended up putting it in the line from the IC to TB.

July 29, 2003
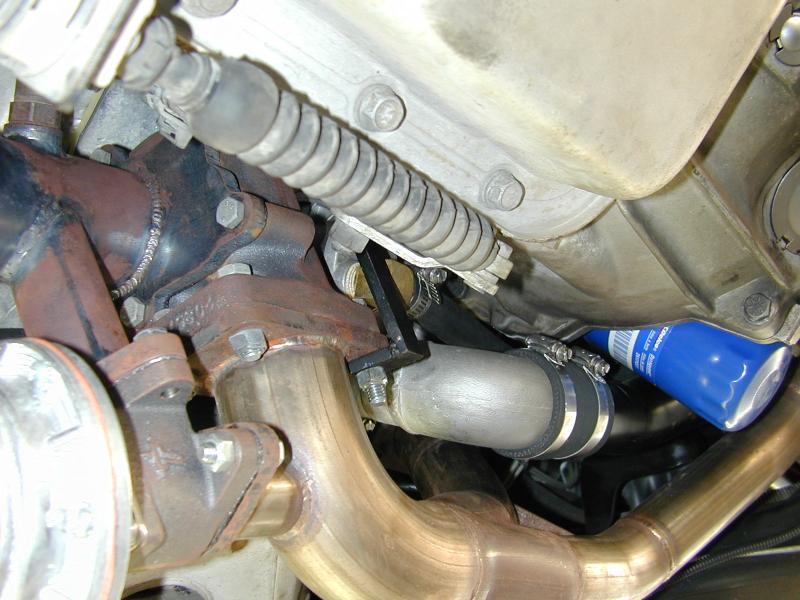
The downpipe was just a wee bit out-of-line, so I couldn't get all the exhaust plumbing done on my own. I ended up taking the van to an exhaust shop this afternoon [after a morning of MAJOR pain at the dentist] to have them tweak the downpipe to make it fit. They had never seen an Astro with a turbo before.
On the way to the exhaust shop, I only drove about 20 MPH because it was so loud, and the doghouse was off. It was about 100 outside and about 1000 inside the van.
After I got the exhaust hooked up it was quite a bit quieter than the non-turbo, header-equipped van. That'll be good for the sleeper image, but now it's quiet enough that my wife may want to drive it...yikes!
I gave the pedal a stab on the way home, and it didn't seem to make a difference. The next stoplight, it almost died. I limped home and discovered that I forgot to tighten the hose to the TB. The TB was sucking air that the MAF wasn't counting.
July 30, 2003
I hooked up a boost gauge to see how much boost I was running. I started to install my gauge on the dash, then I discovered that the 1/8 inch tubing was too short to make it to the intake manifold. Since the dog house was already off, I just ran a couple feet of hose to the gauge and held it in one hand while I drove.
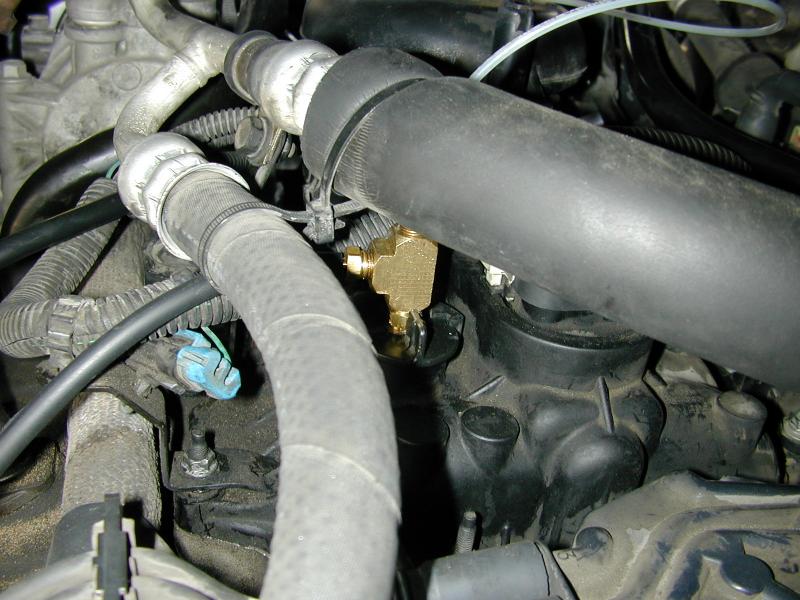
I had a tough time finding the perfect place to tap into for the boost gauge. There aren't tons of vacuum hoses on this beast. I found the MAP sensor was just stuffed into the upper intake via a rubber grommet. &I removed the grommet and stuck a 'T' into the hole. I connected the MAP sensor to one open nipple, and my boost gauge to the other.
That enabled me to see how much boost I was running. I managed to run about 3 psi of boost before the engine started to knock really bad. I decided to remove the Hypertech Power Programming from the van and try again.
August 01, 2003
Spent past two days tring to find 1/8 inch hard plastic/nylon tubing for the boost gauge. I found a 100-ft roll at Grainger. Now, I need to figure out what to do with the other 97 feet of tubing.
I put a compression union on the end of the other tubing and ran a 3-ft piece of the new tubing to the intake manifold.
August 02, 2003
I discovered that I needed one more manifold pressure line for the Extra Injector Controller. I decided to take one leg of my 'T' and put another 'T' on it. That didn't work out too well. When I tried to remove the first 'T', the rubber grommet that was in the upper intake manifold fell down into the intake. I was not happy.
I spent the next several hours trying to dig that grommet out. I gave up and just pulled the upper intake manifold. I didn't want that grommet to get into the turbo or melt in the catalytic converter. I found it way down in the intake, near the intake port of cylinder number 4.
August 05, 2003
The rubber grommet I was looking for was not available at any local GM dealership. You would think a metroplex the size of D/FW would have at least one. I ordered the rubber grommet for MAP sensor and went home to wait.
I learned my lesson. I gave up on using that MAP sensor hole. On the other side of the upper intake, beside the fuel injector assembly, is some sort of plug. I managed to unscrew that plug without breaking it. I drilled and tapped that plug with a hole that the 'T' will fit in. I should have done this in the first place.
August 10, 2003
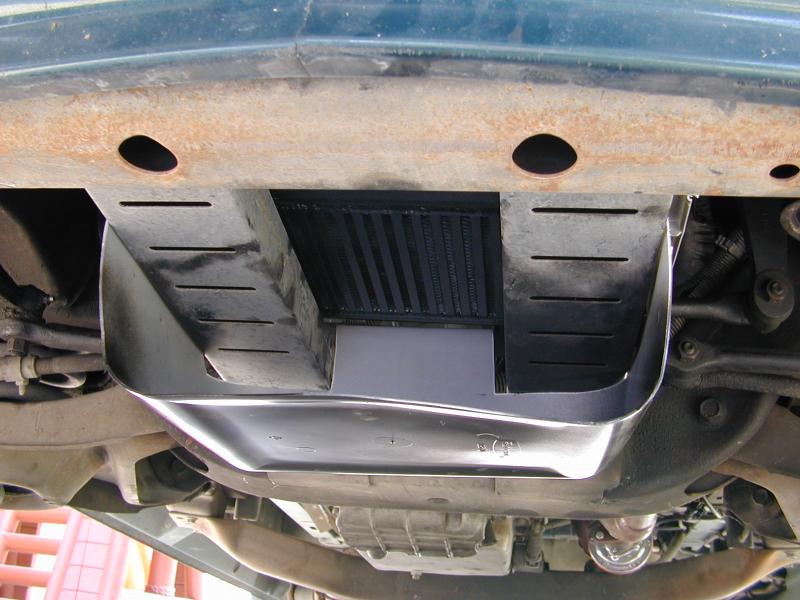
The intercooler rests on top of a couple supports for the body. It was a great place to mount the thing, but there is little to no flow over the intercooler. I decided to create a way to force air through that intercooler. A trip to Wal*Mart and a carpet knife yielded the perfect intercooler scoop.
August 11, 2003
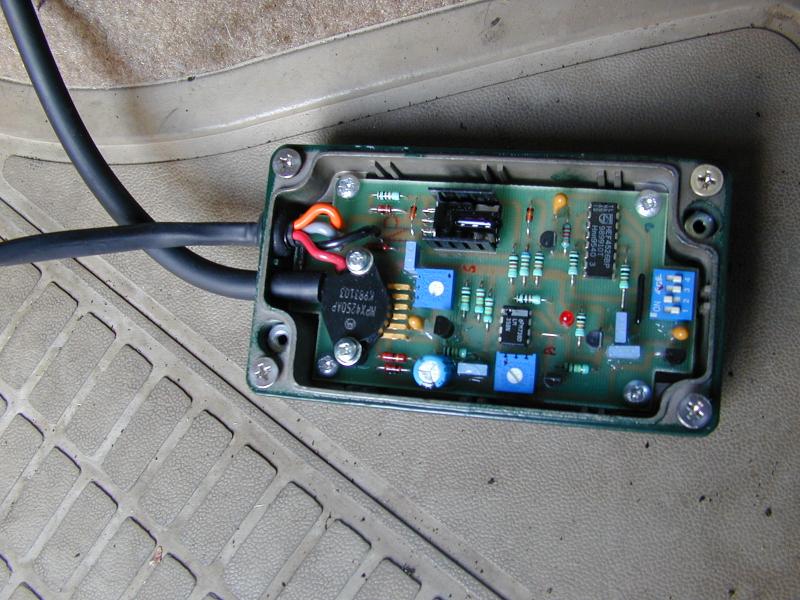
Exchanged e-mail with the guys that make the Link PowerLink Extra Injector Controller. They told me that I need a resistor for the negative side of the coil and a big ballast resistor for each injector. I looked for them today, but had no luck.
to do
Other random photos.
- Move intake pipe to where it should be. See the above photos. The upper radiator hose is in the wrong place.
- Buy resistors for Injector Controller.